Replacing a car CV axle seems simple in theory, but many DIY enthusiasts and even some professionals make costly mistakes. The CV (constant velocity) axle plays a key role in transferring power from your vehicle’s transmission to the wheels, allowing smooth turning and handling. If not replaced correctly, you could face noise, vibration, or even dangerous loss of control. Understanding the most common errors can save you money, time, and frustration. Let’s explore the typical mistakes people make when replacing a CV axle and how to avoid them for a smooth, safe repair.
Not Diagnosing The Real Problem
It’s easy to blame the CV axle for clicking noises, vibrations, or leaks. However, these symptoms can come from other parts like wheel bearings, ball joints, or even suspension components. Swapping out the axle without a full diagnosis can waste both time and money.
For example, a worn-out wheel bearing can sound very similar to a bad CV joint. Always check for leaks, feel for play in the wheel, and listen carefully during test drives. If you ignore a proper diagnosis, you might fix the wrong part and still have the same problem.
Beginners often miss that a torn CV boot can sometimes be fixed without replacing the entire axle—saving money and effort.
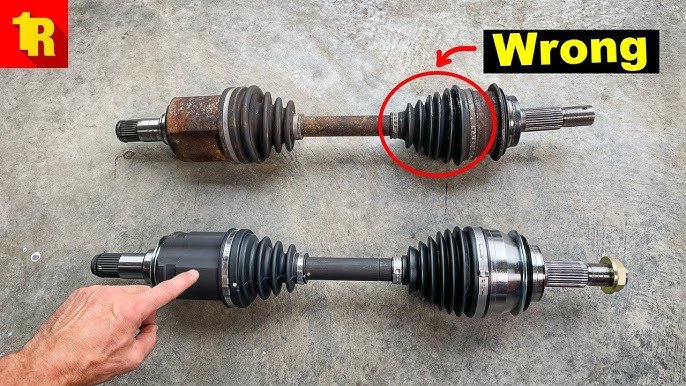
Using The Wrong Replacement Axle
Not all CV axles are the same. Many people order the wrong part based on incomplete information. Axles can differ by transmission type, ABS ring design, or even axle length.
Here’s a simple comparison showing how specs can vary:
| Vehicle | Transmission | CV Axle Length | ABS Ring |
|---|---|---|---|
| Honda Accord 2005 | Automatic | 24.8 in | Yes |
| Honda Accord 2005 | Manual | 24.5 in | No |
Always double-check your car’s make, model, year, transmission, and whether your car uses ABS sensors. A wrong axle can cause poor fitment, vibration, or even premature failure. Also, many cheap aftermarket axles don’t last as long as OEM or high-quality brands, so avoid the temptation to buy the cheapest part you find.

Credit: www.reddit.com
Skipping Proper Safety Steps
Working under a car is dangerous if you don’t follow safety basics. Many people skip using jack stands or rely only on a hydraulic jack. This is a serious risk—cars can fall suddenly, causing injury or death.
Always:
- Use a flat, solid surface.
- Chock the rear wheels.
- Support the car with jack stands rated for your vehicle’s weight.
- Wear gloves and safety glasses.
Neglecting safety can turn a simple job into an emergency. Remember, your life is more valuable than any repair.
Forgetting To Loosen The Axle Nut First
It’s much easier to loosen the axle nut while the car is still on the ground. If you raise the car and remove the wheel first, the hub will spin, making it much harder to break the nut loose.
A common beginner mistake is lifting the car too soon. Always break the axle nut loose (it may require a breaker bar or impact wrench) before you jack up the car or remove the wheel. If you forget, you may need to lower the car again, wasting time and risking damage.
Credit: www.youtube.com
Damaging The Transmission Seal
When removing or installing the CV axle, you must be careful not to tear or nick the transmission (or differential) seal. This seal stops transmission fluid from leaking out. If you damage it, you’ll end up with leaks and potential transmission problems.
Many people use a pry bar incorrectly or force the axle in or out at the wrong angle. Always use the correct tool and gentle pressure. If you see the seal is old, cracked, or leaking, replace it before installing the new axle.
Skipping this step can lead to expensive repairs.
Not Adding Or Checking Transmission Fluid
Some cars lose a small amount of transmission fluid when you remove the axle. If you forget to check and top it up, your transmission may not work properly, or worse, it could overheat and fail.
After installing the new axle, always check the transmission fluid level. Top up if needed with the correct type. Don’t just assume it’s fine—low fluid can ruin your transmission quickly.
Credit: www.brakeandfrontend.com
Improperly Torquing The Axle Nut
The axle nut must be tightened to a specific torque specification. If it’s too loose, the wheel bearing can become damaged. If it’s too tight, you can strip threads or crush the bearing.
Here’s how torque specs can differ:
| Car Model | Axle Nut Torque Spec |
|---|---|
| Toyota Camry 2012 | 159 ft-lbs |
| Honda Civic 2010 | 134 ft-lbs |
| Nissan Altima 2015 | 174 ft-lbs |
Always use a torque wrench and follow the manufacturer’s specification. Do not guess or “tighten until it feels right. ” Over- or under-tightening are both common mistakes that can ruin your repair.
Not Cleaning Mating Surfaces
When you remove the old axle, dirt, rust, or old grease can remain on the mating surfaces inside the hub and transmission. If you don’t clean these areas, the new axle may not seat properly, causing vibration, uneven wear, or leaks.
Always clean all mating surfaces with a rag and brake cleaner. Inspect for rust or damage. If you rush this step, you may end up doing the job twice.
Ignoring The Snap Ring Position
Many CV axles use a snap ring (or circlip) at the end. It must be correctly seated in the transmission or differential. If it’s not, the axle could pop out while driving, causing loss of power to the wheels.
Check the snap ring is present, undamaged, and fully seated. Some people forget to transfer the snap ring from the old axle to the new one, or don’t push the axle in far enough. You should feel or hear a “click” when it locks into place.
Forcing The Axle During Installation
Installing the new axle requires some pressure, but if you force it too hard, you can damage the splines or seals. Avoid hitting the axle with a hammer or using excessive force.
If the axle won’t slide in, check for alignment issues, burrs on the splines, or debris. Lightly lubricate the splines with the recommended grease. Forcing parts together is a classic beginner mistake.
Failing To Tighten Suspension And Steering Bolts
Replacing a CV axle often means you must disconnect suspension or steering components like the lower ball joint or tie rod end. If you forget to fully tighten these bolts during reassembly, you risk a dangerous failure while driving.
Always refer to the service manual for the proper torque specs for every bolt you touch. Double-check your work before lowering the car. Skipping this step can lead to loose wheels or loss of steering control.
Not Replacing Worn Components At The Same Time
If your CV axle failed due to age or wear, other parts nearby may also be ready to fail. For example, ball joints, tie rod ends, or wheel bearings may show signs of wear.
It’s much easier to replace these parts while the car is already apart. Many people skip this step to save money but end up paying more in the long run. Inspect all related parts and replace any that are questionable.
This ensures you won’t have to do the same job again soon.
Overlooking Test Drive And Final Inspection
After replacing the CV axle, some people skip the test drive or final inspection. This is a mistake—you need to make sure everything is working correctly.
During your test drive, listen for noises, check for vibrations, and make sure the car handles well. After the drive, recheck all bolts, the axle nut, and fluid levels. Sometimes, a small leak or loose bolt will only show up after driving.
Don’t assume the job is done until you’ve checked everything.
Not Understanding Warranty And Core Charges
Many new CV axles come with a warranty or require you to return the old part (core charge). If you throw away your old axle or lose your receipt, you could lose money or void the warranty.
Check with your parts supplier about any core charges or warranty paperwork. Keep your receipt and store the old axle until you know the new one works perfectly. This is especially important for rebuilt or remanufactured axles.
Missing Non-obvious Steps
Some car models have unique procedures. For example, certain vehicles require unbolting a carrier bearing or removing a suspension crossmember to get the axle out. If you miss these model-specific steps, you can damage parts or get stuck halfway through the job.
Always read the service manual or a trusted repair guide for your specific car. Don’t rely only on online videos—double-check your steps for your exact model and year. Beginners often forget this and run into unexpected problems.
Common Symptoms Of A Bad Cv Axle
Knowing when your CV axle needs replacement is important. Here are the top signs to watch for:
- Clicking or popping when turning, especially at low speeds
- Grease on the inside of the wheels or undercarriage
- Vibration during acceleration
- Clunking noises or shuddering
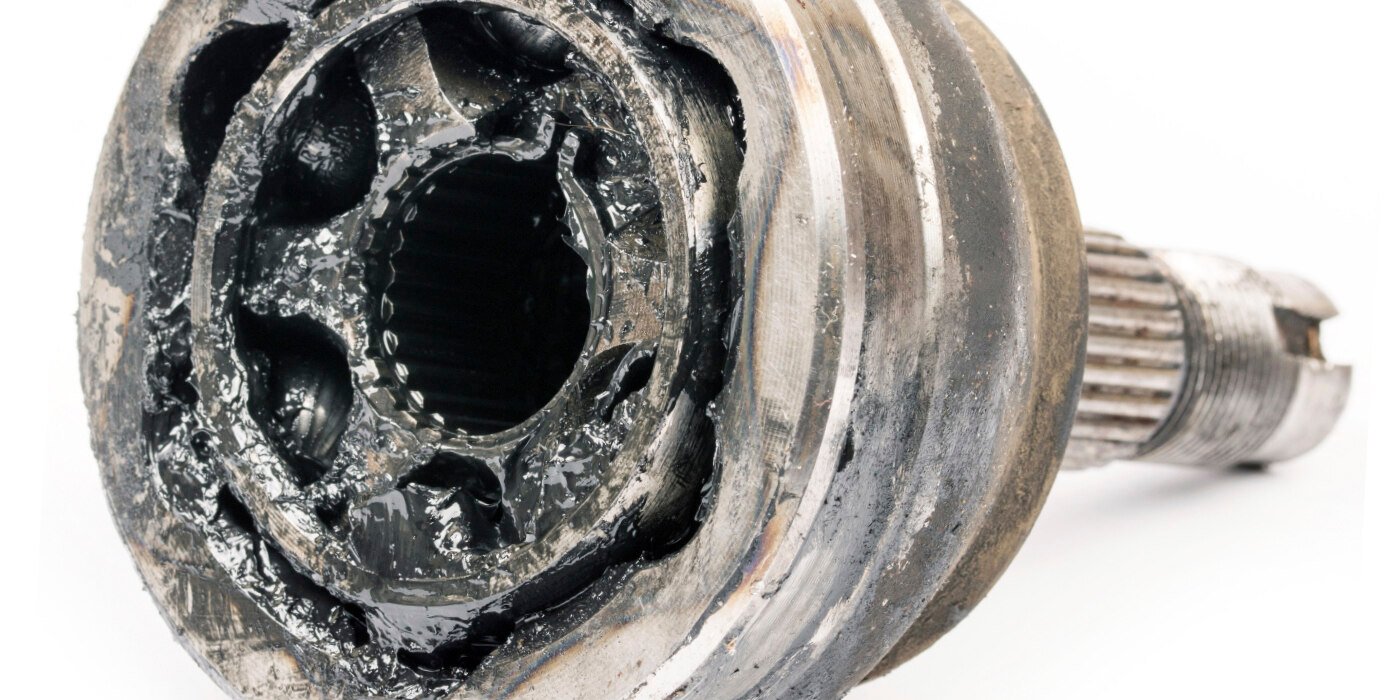
- Visible cracks or tears in the CV boot
If you notice these symptoms, inspect your axle before it fails completely.
Diy Vs. Professional Replacement
Replacing a CV axle is possible for skilled DIYers with the right tools and knowledge. However, mistakes can be costly or dangerous. If you lack experience, special tools (like a torque wrench or axle puller), or a safe workspace, it’s wise to consult a professional mechanic.
Here’s a quick comparison:
| Aspect | DIY | Professional |
|---|---|---|
| Cost | Lower parts cost, no labor fees | Higher, but includes labor and warranty |
| Tools Needed | Basic + special tools | Shop has all tools |
| Risk of Mistakes | Higher for beginners | Lower, experienced |
| Time Required | 2–4 hours | 1–2 hours |
If you’re unsure, paying a pro can prevent bigger problems later.
Practical Tips For Success
- Take clear photos before disassembly to help with reassembly.
- Bag and label bolts and small parts.
- Use the correct grease and lubricants for splines and seals.
- Never re-use axle nuts unless the manual says it’s safe.
- Always test drive and inspect after the job.
By avoiding these mistakes and following best practices, you can replace your car’s CV axle safely and successfully.
Frequently Asked Questions
What Is A Cv Axle And Why Is It Important?
A CV axle (constant velocity axle) transfers power from your car’s transmission to the wheels while allowing them to turn and move up and down with the suspension. Without a working CV axle, your car can’t drive properly or safely.
How Do I Know If My Cv Axle Is Bad?
Common signs include clicking when turning, grease leaking from the axle boot, vibrations when driving, or loud clunks. If you notice these, it’s time to inspect your axle.
Can I Drive With A Bad Cv Axle?
It’s not safe. A damaged CV axle can break completely, causing loss of power to the wheels or even making the car undrivable. It can also damage other parts if ignored.
How Much Does It Cost To Replace A Cv Axle?
DIY replacement usually costs between $60 and $200 for parts. Professional replacement can range from $200 to $600 depending on your car and labor rates. Always ask for a quote before starting.
Where Can I Find Reliable Information On Cv Axle Replacement?
A good source for detailed, model-specific instructions is the Wikipedia CV Joint page. It explains the workings, types, and importance of CV joints and axles.
Replacing a CV axle is a rewarding task if done right. By understanding and avoiding common mistakes, you can enjoy a smoother, safer ride and avoid unnecessary expenses down the road.
