
Replacing a car’s head gasket is a complicated task that requires skill, patience, and the right tools. Many drivers and even some mechanics underestimate the difficulty of this repair. But a single mistake can lead to engine damage, wasted money, or even total engine failure. If you’re considering doing this job yourself, or you want to understand what could go wrong, it’s important to learn about the common mistakes people make when replacing a car head gasket. This knowledge will help you avoid errors, save costs, and keep your engine running smoothly for years.
What Makes Head Gasket Replacement Tricky?
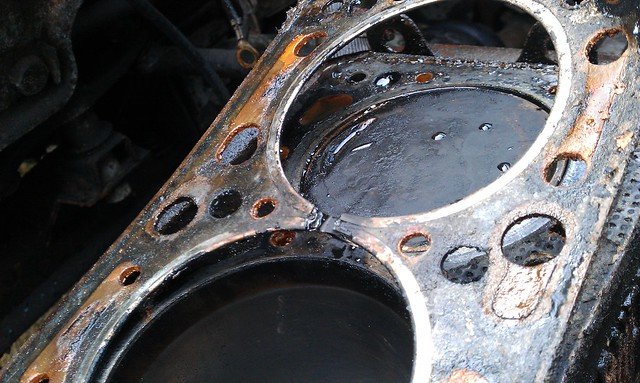
The head gasket sits between the engine block and the cylinder head. Its job is to seal the combustion chambers and separate coolant from oil. This gasket must endure high pressure, extreme temperatures, and constant vibration. Over time, it can wear out, leading to leaks and engine problems.
Replacing a head gasket isn’t just about swapping a part. It involves careful disassembly, cleaning, checking for hidden damage, and following precise tightening patterns. Missing even a small detail can make the new gasket fail quickly.
Most Common Mistakes When Replacing A Head Gasket
Let’s look at the specific errors that happen most often during head gasket replacement. For each, you’ll learn what goes wrong and how to prevent it.
1. Not Diagnosing The Real Cause
People sometimes assume the head gasket is the problem without proper testing. Symptoms like overheating or oil in the coolant can also be caused by a cracked head, a bad thermostat, or a leaking radiator. Replacing the head gasket won’t fix these issues.
Tip: Always do a compression test, leak-down test, or chemical test to confirm a head gasket failure. Check for other possible causes first.
2. Ignoring Cylinder Head Warping Or Cracks
When the engine overheats, the cylinder head can warp or crack. If you install a new head gasket on a warped or cracked head, it will fail again—sometimes within days.
Tip: Have the cylinder head checked by a machine shop. They can test for cracks and measure if the surface is flat. If it’s not, the head must be machined or replaced.
3. Failing To Clean Mating Surfaces Properly
Old gasket material, dirt, or oil left on the block or cylinder head can prevent a good seal. Even a tiny piece of debris can cause leaks.
Tip: Clean both surfaces until they are smooth and spotless. Use a plastic scraper and a lint-free cloth. Avoid metal tools that might scratch the surface.
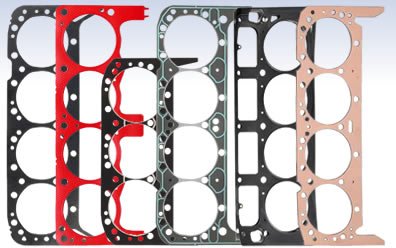
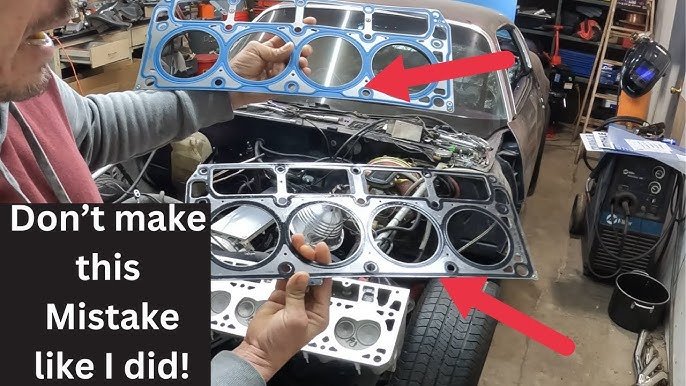
4. Using Wrong Or Cheap Gasket Materials
Some people try to save money by buying low-quality gaskets. Others use the wrong type for their engine.
Tip: Always use a high-quality head gasket that matches your engine’s specifications. Cheap gaskets often fail quickly, costing you more in the long run.
5. Not Checking Head Bolts For Stretch
Head bolts stretch when torqued. Reusing old bolts can lead to leaks, because they may not clamp the head tight enough.
Tip: Check the repair manual to see if your engine uses “torque-to-yield” bolts. These must be replaced every time. If in doubt, use new bolts.
6. Incorrect Bolt Tightening Sequence
Every engine has a special pattern for tightening head bolts. Doing this wrong can warp the head or crush the gasket unevenly.
Tip: Follow the exact tightening sequence and torque settings listed in the service manual. Usually, bolts are tightened in several steps, starting from the center.
7. Over-tightening Or Under-tightening Bolts
Too much torque can strip threads or break bolts. Too little lets the gasket leak.
Tip: Use a quality torque wrench. Double-check the torque specs for your engine and follow them closely.
8. Skipping Coolant And Oil Flush
After a blown head gasket, the cooling and oil systems are often contaminated with oil, coolant, or debris. Not flushing them can cause problems later.
Tip: Flush the cooling system and change the oil and filter before starting the engine with the new gasket.
9. Not Replacing Other Worn Components
A head gasket failure often happens with other parts wearing out, like the thermostat, water pump, or timing belt. Replacing just the gasket may not solve your problems.
Tip: Inspect and, if necessary, replace related parts while the engine is apart. This saves time and prevents future breakdowns.
10. Rushing Reassembly
Some people try to finish the job quickly, leading to missed steps or loose parts.
Tip: Take your time. Double-check each step before moving on. Patience reduces mistakes.
11. Ignoring Engine Timing
On engines with timing belts or chains, the timing may be disturbed during disassembly. Incorrect timing can cause poor running or engine damage.
Tip: Mark timing positions before removing parts. Re-check timing after reassembly.
12. Not Bleeding Air From Cooling System
Air pockets in the cooling system can cause overheating and new gasket failure.
Tip: Follow the correct procedure for bleeding air from your vehicle’s cooling system after refilling it.
13. Forgetting To Re-torque The Head (if Required)
Some engines need the head bolts re-torqued after the first warm-up cycle. Skipping this step can cause leaks.
Tip: Check your service manual. If re-torquing is required, don’t skip it.
14. Using Sealants Incorrectly
Some head gaskets need a specific sealant, but using the wrong type or too much can block cooling passages or cause leaks.
Tip: Only use sealant if the manufacturer specifies it, and apply it exactly as instructed.
15. Not Inspecting For Block Damage
A blown head gasket can damage the engine block. Cracks or pitting on the block surface will make any new gasket fail.
Tip: Carefully inspect the block for damage. If you find issues, consult a machine shop.
16. Missing Small Parts Or Hoses
It’s easy to lose or forget small parts, hoses, or sensors during a complex job.
Tip: Keep all parts organized and labeled. Use photos or diagrams to help with reassembly.
17. Skipping A Final Leak Test
After reassembly, some people skip testing for leaks. This is risky, especially if you missed a mistake.
Tip: Pressure-test the cooling system before driving the car. Check for leaks around the head and gasket area.
Credit: www.kseal.com
Data: Cost Of Mistakes Vs. Proper Head Gasket Replacement
Here’s a comparison of typical costs when head gasket replacement is done correctly versus when mistakes happen:
| Scenario | Average Cost (USD) | Possible Extra Costs |
|---|---|---|
| Proper head gasket replacement | $1,200 – $2,000 | None/minimal |
| Mistake: Skipping head resurfacing | $1,200 – $2,000 + $1,000 (re-do) | Repeat labor, extra parts |
| Mistake: Reusing old bolts | $1,200 – $2,000 + $800 (re-do) | Repeat labor, possible engine damage |
| Mistake: Not flushing oil/coolant | $1,200 – $2,000 + $500 (repairs) | Engine bearings, radiator damage |
Professional Vs. Diy: Risk And Complexity
Doing a head gasket replacement yourself can save money, but it’s not as simple as changing spark plugs. Here’s a side-by-side look at what’s involved:
| Factor | Professional Mechanic | DIY Repair |
|---|---|---|
| Tools & Equipment | Has all specialty tools, torque wrenches, cleaning equipment | May need to buy/borrow tools, risk of using the wrong tool |
| Experience | Knows common engine-specific problems and techniques | May miss hidden issues, learning on the job |
| Warranty | Often provides warranty on parts and labor | No guarantee if something goes wrong |
| Time Needed | Usually 1–2 days | Can take several days or weeks |
| Cost | Higher initial cost | Lower cost, but high risk if mistakes happen |
Credit: www.onallcylinders.com
Hidden Dangers Beginners Often Miss
Even careful DIYers can make mistakes that aren’t obvious at first:
- Overlooking small cracks: Sometimes, cracks are tiny and only visible with special dye or pressure testing. Missing these can ruin your work.
- Coolant type errors: Using the wrong coolant (e.g., mixing colors or brands) can cause chemical reactions, leading to gasket failure.
- Cleaning chemical residue: Using strong cleaners but not rinsing them off can leave chemicals that eat away at the new gasket.
How To Avoid The Most Costly Mistakes
If you want to avoid repeating the repair or, worse, damaging your engine, here are some tips:
- Read the manual: Every engine is different. The service manual has vital information like torque specs, tightening order, and unique steps.
- Photograph everything: Take pictures as you take things apart. This makes reassembly easier and helps you spot missing parts.
- Label bolts and parts: Use zip-lock bags and labels for each group of bolts or parts. Some bolts are different lengths or types.
- Don’t rush: Set aside more time than you think you need. Rushing leads to mistakes.
- Ask for help: If you’re unsure, consult an expert or ask for advice on a trusted forum.
Signs You Made A Mistake (and What To Do)
After replacing the head gasket, watch for these warning signs:
- Engine still overheats: May be trapped air, a missed coolant leak, or a warped head.
- White smoke from exhaust: Could mean coolant is still entering the cylinders.
- Milky oil: Shows coolant mixing with oil, indicating a leak.
- Loss of power or rough running: Possible timing issue or compression loss.
If you notice any of these, stop driving the car. Double-check your work, and don’t be afraid to get a second opinion from a professional.
Real-world Example
A 2012 Honda Civic owner replaced the head gasket after overheating but skipped having the head checked for warping. Two weeks later, the new gasket failed again, costing an extra $1,500 for a second repair. This is a common situation—trying to save a little upfront can mean paying much more later.
Comparing Old And New Head Gasket Technologies
Modern engines sometimes use multi-layer steel (MLS) head gaskets instead of older composite types. Here’s how they compare:
| Feature | Composite Gasket | MLS Gasket |
|---|---|---|
| Durability | Moderate | High |
| Heat Resistance | Lower | Excellent |
| Cost | Lower | Higher |
| Surface Prep Needed | Less critical | Very critical |
Frequently Asked Questions
What Are The Symptoms Of A Bad Head Gasket?
Common signs include overheating, white smoke from the exhaust, milky oil, coolant loss, or poor engine performance. Sometimes you’ll notice bubbles in the coolant or a sweet smell from the exhaust.
Can I Replace A Head Gasket Myself?
Yes, but it’s a complex job requiring special tools, patience, and careful work. If you lack experience, it’s easy to make mistakes that could damage your engine.
How Long Does A Head Gasket Replacement Take?
A professional mechanic usually needs 1–2 days. A DIY job can take several days or even longer, depending on your skill and available tools.
Is It Worth Replacing A Head Gasket On An Old Car?
It depends on your car’s value, overall condition, and repair costs. For some older cars, the cost of repair might be more than the car is worth. Check used car prices and consider getting advice from a mechanic before making your decision.
Where Can I Find Detailed Instructions For My Specific Car?
You can find official service manuals for most vehicles online or at your local library. Trusted automotive forums and websites like Haynes Manuals also provide step-by-step guides for many makes and models.
Replacing a head gasket is one of the most challenging DIY automotive repairs. But by learning about these common mistakes and how to avoid them, you give yourself the best chance of success. Take your time, follow the manual, and always check twice.
Your car—and your wallet—will thank you.
Credit: www.youtube.com
